Can I paint an antique dresser?
Short answer: Yes—many mass-produced vintage and antique dressers with patched veneer, mismatched secondary woods, or failing dark varnish are strong candidates for paint. However, painting is largely irreversible on porous wood and antique patinas, so you should always inspect the timber figure, maker marks, and surface condition before deciding between natural wood refinishing, a two-tone hybrid, or a full painted finish.
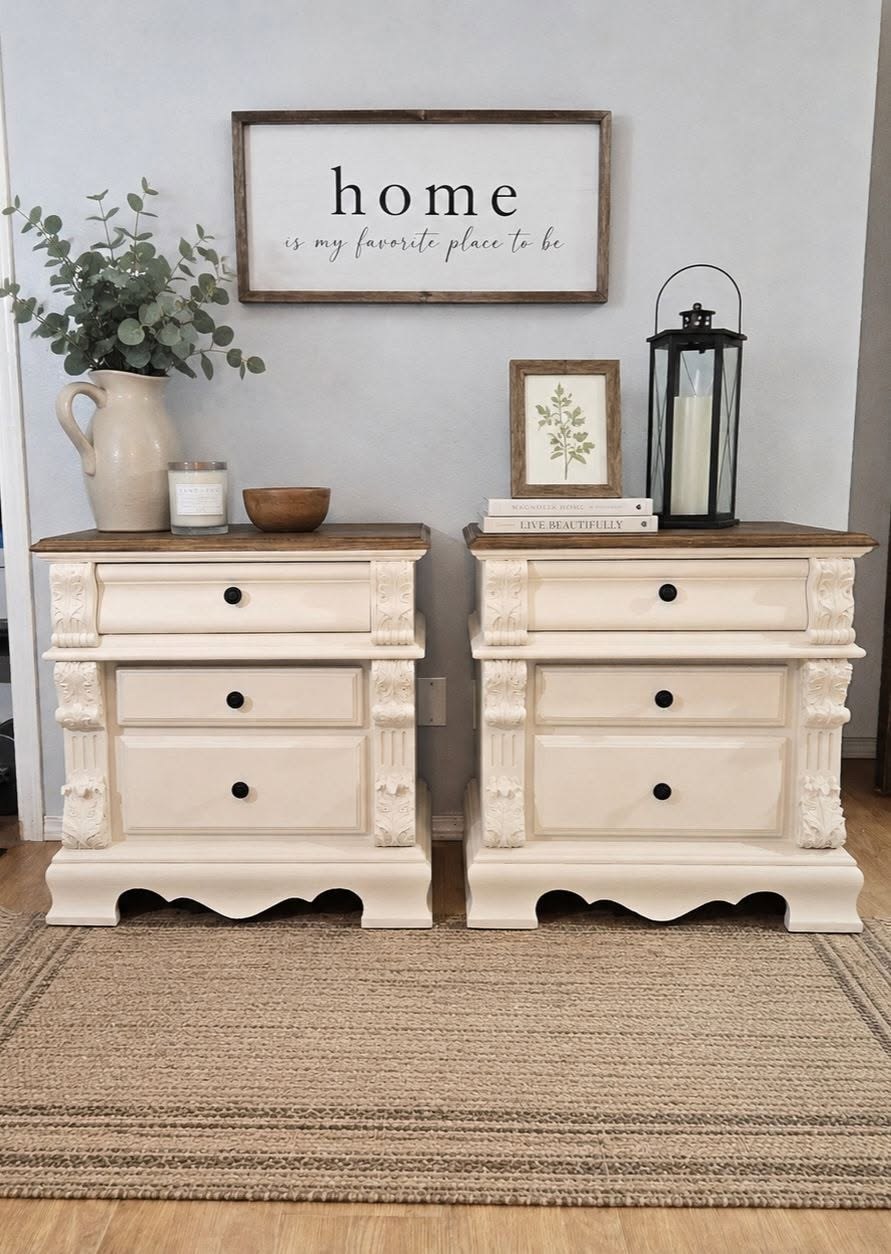
Match the finish direction to the piece in front of you.

Best when bookmatched mahogany, walnut, or quartersawn oak is intact, or when documented maker provenance drives the piece's value.

Ideal when the top or drawer fronts have handsome hardwood grain, while the lower case needs putty repairs or visual lightening.

Best when chipped veneer requires Bondo/putty rebuilding, secondary woods clash, or the piece is a common vintage form needing a clean reset.
1. Avoid blanket rules: evaluate what kind of "antique" you own
Online advice often splits into two extremes—claiming either that painting any old wood furniture is a mistake, or that every brown dresser should be painted immediately. In practice, furniture built between the late 1800s and the 1960s spans a wide spectrum:
- True collector or signed period pieces: If a dresser dates to the 18th or early 19th century, carries an intact original shellac or French polish patina, or features rare bookmatched flame mahogany and intact paper maker labels—like the Grand Rapids piece documented in our Sligh Empire dresser restoration—painting will permanently reduce its historical and monetary value.
- Utilitarian or mass-produced vintage case goods: Millions of sturdy dressers produced between 1910 and 1970 were factory-built from mixed secondary hardwoods (such as poplar, birch, or gumwood) sprayed with dark muddy toner to imitate mahogany or walnut. When that factory finish crazes, peels, or suffers edge damage, a well-executed painted or two-tone finish honors the solid joinery without pretending the piece is a museum artifact.
2. Understand the consequences of irreversible changes
Before opening a can of primer, consider what cannot easily be undone once paint touches an older piece:
- Pigment lodges in open wood pores: Open-grained species like oak, mahogany, walnut, and ash absorb primer deep into their pore structure. Even if someone chemically strips the dresser years later, microscopic specks of white or colored pigment often remain trapped in the grain and carvings.
- Sanding and Bondo alter the substrate: When a dresser has crushed corners or missing veneer patches, rebuilding those areas with two-part Bondo or wood putty creates a glass-smooth surface for custom furniture painting, but those filled patches can never take a transparent wood stain in the future.
- Original patina cannot be recreated: Aged wood oxidizes naturally over decades of light exposure. Stripping or priming erases that natural oxidation layer permanently.
3. Inspect veneer condition and secondary woods
Many people assume older dressers are either "100% solid wood" or "cheap veneer." As explained in our guide to identifying real wood furniture, high-end antique and mid-century dressers frequently use thin sheets of genuine decorative hardwood veneer over solid lumber-core panels.
- When the veneer is intact across all faces: Stripping and wood refinishing lets the natural figure shine.
- When veneer is chipped, blistered, or missing along drawer edges: Small filler patches remain visible under clear stain. If the damage is too widespread to blend invisibly as natural wood, stabilizing the loose veneer and leveling the missing sections with putty or Bondo under an opaque enamel finish saves the dresser from the landfill.
- When the two-tone compromise works best: If the dresser top is solid hardwood in great condition while the lower case or drawer trim has heavy wear, a two-tone design—such as our two-tone antique cream nightstands—preserves the natural wood top while refreshing the body.
4. Preparation, adhesion, and stopping tannin bleed-through
Painting an antique dresser requires far more preparation than painting modern raw wood. Skipping surface chemistry is the main reason DIY painted dressers peel, feel tacky, or develop yellow-pink stains weeks later:
- Removing decades of wax, oil, and silicone polish: Older furniture has usually been wiped for years with paste wax, lemon oil, or silicone-based sprays. Paint and primer cannot bond over wax or silicone. The surface must be thoroughly degreased and dewaxed before mechanical scuff-sanding, or the new coating will fish-eye and delaminate.
- Blocking water-soluble wood tannins: Woods commonly used in antique dressers—especially mahogany, cherry, red oak, walnut, and cedar—contain high concentrations of natural polyphenols (tannins). When moisture from waterborne primers or paints touches bare or sanded wood, those tannins dissolve and wick upward into the paint film, leaving blotchy pink, amber, or brownish discoloration.
- Choosing the right barrier primer: Standard latex wall primers do not stop antique mahogany or oak tannins. A dedicated alcohol-based shellac barrier (such as dewaxed shellac or pigmented shellac primer) or a high-build oil/alkyd stain-blocking primer is needed to lock extractives into the wood and establish reliable mechanical adhesion before applying cabinet-grade urethane or acrylic enamel.
- Planning hardware at the same time: Removing original pulls before prep—and deciding whether to polish the original brass or plug old holes for new pulls via hardware restyling—prevents paint ridges around backplates.